10 Tips and tricks for Pressbooks
Introduction
This chapter includes advice and tips on using the Pressbooks platform. It covers the following topics:
- introduction to Pressbooks
- getting content into Pressbooks
- plugins
- useful Pressbooks features
- Cascading Style Sheets (CSS)
Introduction to Pressbooks
Pressbooks is the OER publishing platform that Monash University Library (MUL) uses. The software has many features that allow it to generate professional-looking text from word-processed materials.
MUL Pressbooks access is limited to authors of successful competitively assessed title proposals. Monash authors wishing to create an open text in Pressbooks are encouraged to discuss their ideas with Library staff, who will explain how to apply for an OER grant.
Getting content into Pressbooks
The three methods of getting content into Pressbooks are:
- Import the manuscript into Pressbooks.
- Copy/paste the content into Pressbooks.
- Write directly in Pressbooks.
There are pros and cons for each method.
Table 10.1: Pros and cons of getting content into Pressbooks
| Method | Pros | Cons |
|---|---|---|
| Import content into Pressbooks | Word documents retain most of their formatting when imported into Pressbooks.
When drafting in Word, it is easy to collaborate with co-authors, especially if they do not have access to Pressbooks. Per usual practice, manuscripts can be provided to peer reviewers and copy editors. |
Content created in Google Docs needs to be converted into a .docx file. |
| Copy/paste content into Pressbooks | If copied/pasted from Word, most formatting will be retained when pasted into Pressbooks if it is formatted correctly. | Copying/pasting is more time-consuming than importing the manuscript. |
| Write directly in Pressbooks | Authors can immediately see how their work appears on screen. This is helpful when the content includes a large number of multimedia files. | Author collaboration on the same chapter needs additional coordination, as access is one user at a time.
Blind peer review is hard to manage. A text version of multimedia files (e.g. H5P) will need to be provided to the copy editor. |
Most textbooks can be efficiently produced in Microsoft Word or Google Docs, as authors, peer reviewers, and copy editors use these applications. However, if a text has many multimedia files, it may be more practical to write directly in Pressbooks. In this case, alternative methods are needed for reviewers and copy editors to comment on the manuscript.
Japanese Introductory 1 is a highly interactive book written directly on the Pressbooks platform.
Formatting tips
The following tips cover what we commonly encounter when publishing in Pressbooks.
To save time and avoid extra formatting inside Pressbooks, prepare the manuscript for importing:
- apply the Normal style to all the text,
- apply heading styles (H1 for chapter titles, H2 for sub-headings, etc.)
- apply bold and italics
- remove EndNote field codes
- remove hanging indents in reference lists.
Refer to the Pressbooks User Guide for further information about getting content into Pressbooks.
Plugins
Pressbooks supports plugins, such as H5P, TablePress and LaTex. To use a plugin, activate it in the Plugins menu on the left sidebar.
H5P
H5P files are used to present content or provide interactive activities. They are easy to import into or create within Pressbooks. H5P files are inserted into a chapter using the menu option or by copying the shortcode onto the page.
When using the H5P interactive video content type, first host the video on a dedicated streaming service outside Pressbooks, such as Vimeo or YouTube. Then, link to the video from within the H5P in Pressbooks. You cannot create the H5P in Moodle (Learning Management System) and then upload the H5P into Pressbooks, as the maximum upload to the Media Library is 24 MB.
TablePress
Tables can be created within Pressbooks or by using the TablePress plugin.
TablePress creates attractive tables that can be searched, sorted, and filtered. Another benefit is that they comply with accessibility standards.
Useful Pressbooks features
Glossary terms
Glossary terms are used to define or explain the meaning of content-specific words. In Pressbooks, glossary terms can be displayed as tooltips in the text of the webbook and the glossary list in the book’s back matter.
There are two ways of adding glossary terms to a book.
- They can be created using the Glossary Terms tool on the left sidebar menu and linked throughout the book.
- They can be created inside the content editor of the book.
The Pressbooks User Guide has instructions for creating glossary terms.
When we first used glossary terms at MUL, we found that they should be inserted only at the first occurrence of the term on a web page. If a glossary term is inserted for the same word in multiple places on the same page, it can cause navigation problems for users. When the glossary term is closed, the reader is returned to the first occurrence of the term, regardless of where they were reading on the page.
If the ‘Show in Glossary List’ option is ticked, glossary terms are displayed in an alphabetical glossary list. This list should be checked for errors as it is automatically generated and may not be copyedited. At MUL, capitalisation errors crept into the list as glossary terms were mainly created directly from the content editor. This method automatically populates the selected text into the Term field of the Glossary Terms tool, but does not capitalise the term in the glossary list. Checking the glossary list before publication is an opportunity to correct errors and spot other problems, such as glossary terms that are very similar to other glossary terms.
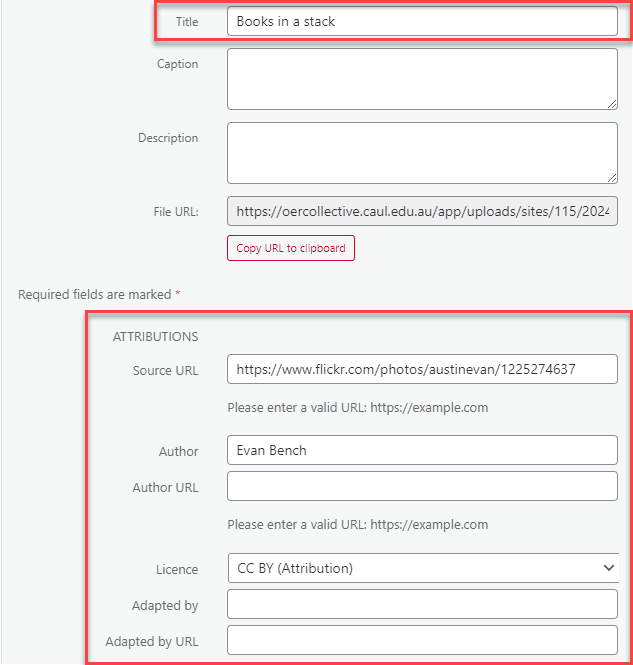
Media attributions
The Pressbooks’ media attributions feature automatically formats media metadata into standardised media attributions that appear at the end of a chapter before the footnotes.
This feature needs to be turned on in a book’s theme options.
Media attribution metadata can be added from within a chapter when you first upload the image. Then, you can add attribution metadata from within the Media Library.
To add metadata, click on the media and enter the metadata in the media attribution fields. The media title may need to be changed to something meaningful for attribution purposes, as Pressbooks automatically uses the file name as the media title.
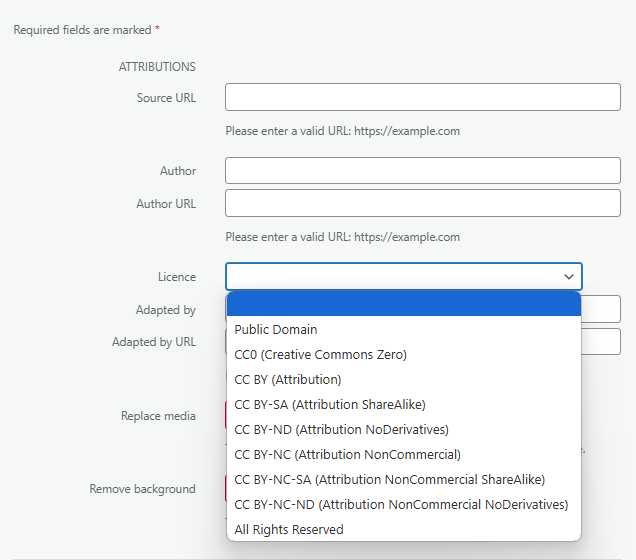
The Licence options in the drop-down menu do not include non-standard licences (e.g. Unsplash, Pexels). A workaround for this limitation is to include author and licence metadata in the author field. This results in an attribution statement that meets the licence's requirements.
Embedding video
Although video files can be uploaded into the Media Library, the limitation on file size mentioned above means that most videos need to be embedded from a dedicated streaming service (e.g. YouTube, Vimeo).
A range of media, including video, can be automatically embedded from third-party providers that support the oEmbed specification.
To embed a video, paste its URL onto a separate line in the visual editor.
Helpful CSS
CSS can be pasted into the custom styles section in Pressbooks to modify the formatting of a book.
In this section, we share CSS that we have used to improve the formatting of the web and EPUB formats of our textbooks.
It’s important to test any changes that are made to a book’s custom styles.
The text inside the /**/ explains what the CSS does.
Acknowledgement
The CSS for increasing the size of the Pressbooks’ previous and next navigation is shared courtesy of Nikki Anderson, University of Southern Queensland.
Attribution
The CSS for preventing words from breaking across lines and increasing the width of sidebar text boxes is reproduced from 'Custom Styles (CSS)' in BCampus Open Education Publishing Style Guide, licensed under a Creative Commons Attribution 4.0 License.
oEmbed is an Application Programming Interface that enables embedding content from one website to another by supplying a URL.
CSS is a computer language used to style web pages.
